


Content:
Importing client information into File In Time software from Excel saves you the time of manually entering each client in the Client Information window. File In Time software is capable of importing data that is in a comma-delimited or tab-delimited text format.
Data Formats
Comma-Delimited File
Data fields in a comma-delimited format are separated by a comma and quotation marks surrounding each field. A carriage return separates the records. The following is an example of a comma-delimited file.
"Nick Ross","RossCo","12 Alton, #100","Irvine","CA","92618"
"William J. Board","","35 La Brea","Los Angeles","CA","90026"
As you can see in the first record, the comma in 12 Alton, #100 is not surrounded by quotes. This means that it is a real comma and not a field delimiter. Also in the second record, since there is no company name, the company name field is shown as ,"". Comma-delimited files are usually followed by the *.csv extension.
Tab-Delimited File
Data fields in a tab-delimited format are separated by tabs. A carriage return separates the records. The following is an example of a tab-delimited file.
Nick Ross RossCo 12 Alton, #100 Irvine CA 92618
William J. Board 35 La Brea Los Angeles CA 90026
As you can see, the tabs are usually displayed by a blank space between the fields.
To Import Data From Another Application
Export client data from your existing program as a comma-delimited or tab-delimited file. Most software packages that maintain client information will let you export it right into Excel. Make note of the name and location of the export file you create. If you have difficulty exporting your data, contact our Support team at 800-426-4741.
If you are adding data to an existing File In Time software database, now is a good time to backup your existing File In Time software data. To do so, choose Backup Database from the Tools menu in File In Time software and save the backup in the database directory or any other directory you choose.
Choose Import Client Information from the File In Time software Tools menu. Select the file you created in Step 1, and then click Open. The following screen will appear.
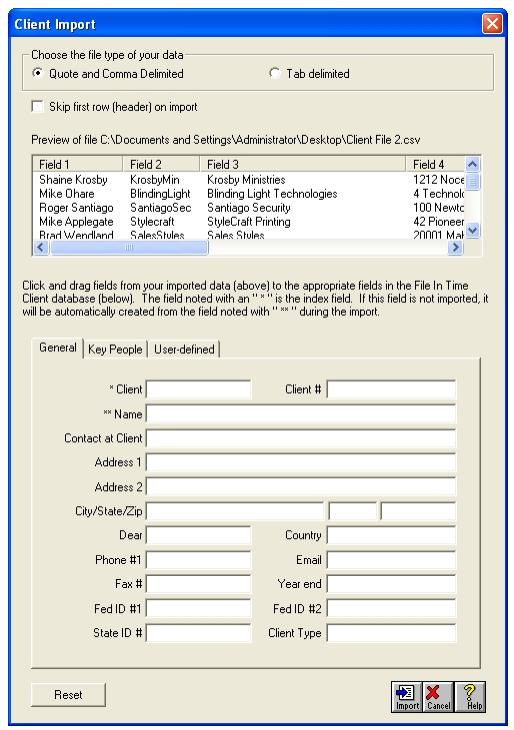
A preview of the first few records of the file to be imported is displayed in the upper half of the Client Import dialog.
The fields available in the File In Time Client database are displayed in the lower half of the dialog. The field marked by an * (default is “Client”) is used by File In Time software to identify the individual client record. This field must be unique because you will often use it to select clients. Some other programs refer to this as an index field. If data for this field is not imported, File In Time software will create it from the information in the field marked with ** (default is “Name”). This field is generally used to show the company or client’s full name.
Choose the type of file – Quote and Comma Delimited or Tab delimited – at the top of the dialog in order to display a preview of the data properly.
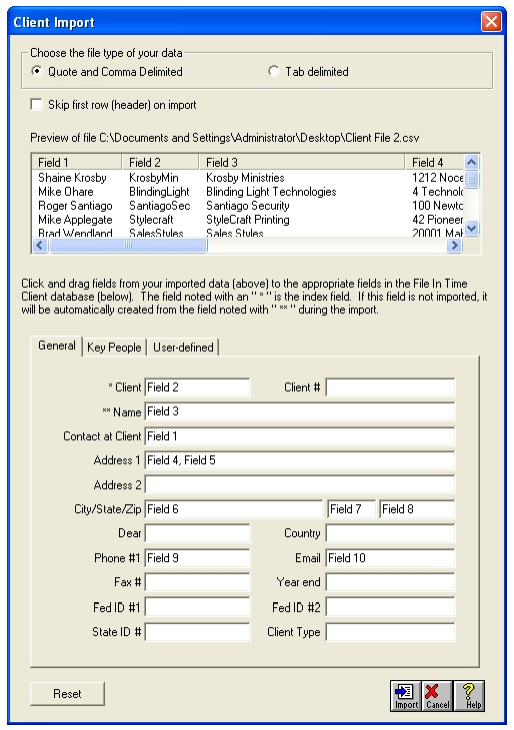
Match the data with the appropriate File In Time software field by clicking and dragging a field from the previewed data to the corresponding File In Time software field. If you do not want to import a field from the previewed data, do not match the data to a File In Time software field.
If you would like to combine two separate fields from your imported file into one field in File In Time software, simply drag both fields from the previewed data to the same field in the File In Time software database. Examples would be separate first and last name fields combined into the File In Time software “Contact at Client” field. Or separate street address and suite numbers combined into the File In Time software “Address 1” field.
When you combine two fields, the following dialog will appear.
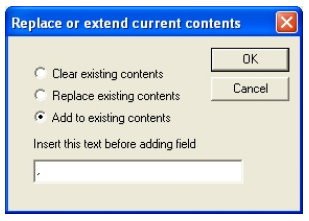
Select the option that best applies and click OK. If you would like to add a comma and space between the two combined fields, select Add to existing contents and type a comma followed by a space in the text field below the selection (as shown in the dialog above).
When you have all the necessary fields assigned to the File In Time software database, your client import dialog will resemble the one shown here.
If at any time you would like to start over in assigning the data to the File In Time software database fields, click the Reset button at the bottom left of the dialog. This will clear the assignments you have done and allow you to begin again.
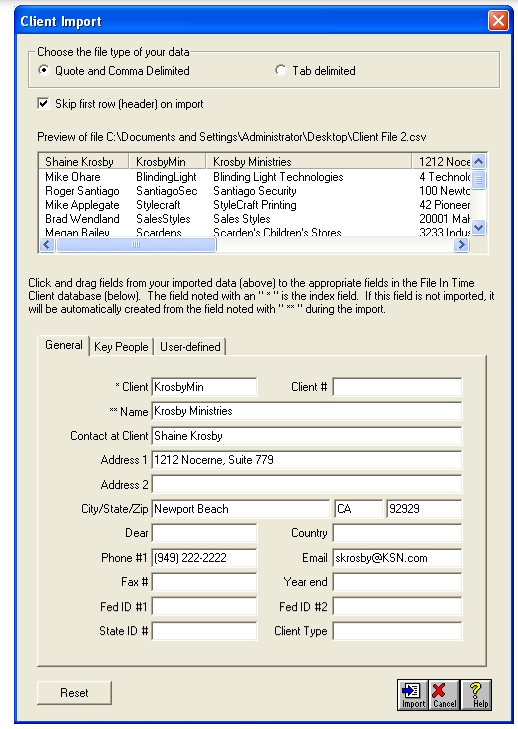
To skip a header row and not import it, check the box near the top of the dialog that reads Skip first row (header) on import. Your client import dialog will then appear as shown below.
When you have all the data to be imported appropriately mapped to the fields in File In Time software, click the Import button.
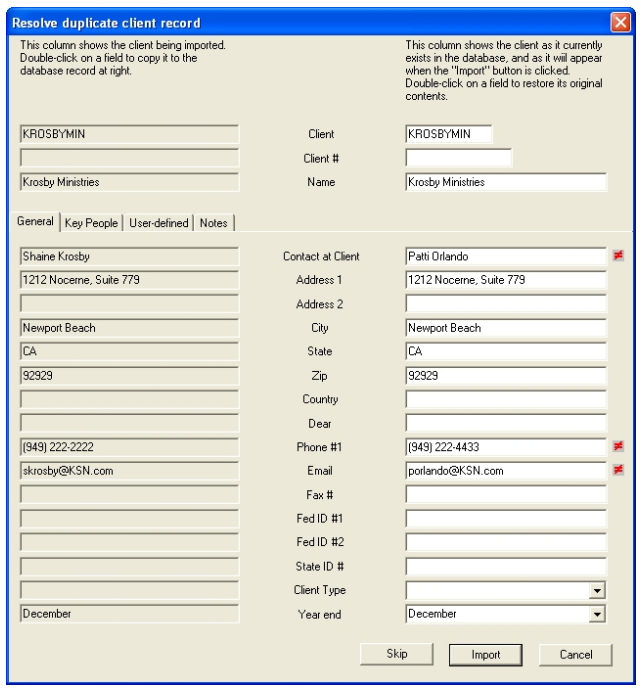
If you are importing a file containing client records that are already in your File In Time software database, a dialog will appear to help you resolve the duplicate client issues.
The red “unequal” symbols to the right of the fields indicate where the client record to be imported differs from the existing client record.
Resolve the duplicate records individually to continue with the import. When the import is complete, you can begin to create tasks within File In Time.
If you have any questions or need any help, please give our Support Team a call at 800-426-4741 or shoot us an email at support@TimeValue.com.